A high-quality picture can give homeowners a tour of a property in the comfort of their hands. The influence of digitization has escalated the real-state industry to another level. That’s when the extensive impact of real estate photography comes in. According to the Wall Street Journal, 61% more people look into properties with professional photography and aerial shot.
By now, it is a known fact that real estate photography, in itself, holds an enormous scope in the industry. The core of real estate is to make properties more appealing to future homeowners while making surfing through the market more and more convenient. For instance, capturing properties in photos that nurture the spirit of the home with proper lighting, color contrasts, and alluring details are bound to enhance the first impression of any client looking for property online.
This blog post is a full-on guide to walk you through everything you need to know if you want to become a real estate photographer.
Page Contents
What Is Real Estate Photography?
Real estate photography is a genre of commercial photography where photographs of real estate properties are taken and put up in the online market for homeowners to look into. With that said, there is more to it than the definition.
It takes an extraordinary eye behind the lens to embrace the homey spirit of any property and capture it in a photograph. From the room’s staging to lighting settings, exposure settings, playing with shadows, and many more, real estate photography is a form of art.
How To Get Into Real Estate Photography?
If photography is your hobby and you are looking for a genre to pursue professional photography, starting small is the very first step. You can volunteer or intern with a Professional real estate photographer. Having someone to observe and learn from will help me gain a basic understanding of this genre of photography. It will also help you understand the market and how you can pursue this as a full-time job.
It will also give you the time and content to build a portfolio to include all your work. Experts at Revepix welcome curious and dedicated volunteers to allow them to explore real estate photography while guiding them through experience.
What Education And Qualification Does A Real Estate Photographer Require?
No specific education is required to be a real estate photographer. However, commonly in California, individuals who have studied photography, such as a Bachelor’s degree in fine arts majoring in photography, would be ideal candidates. Many real estate photographers have also taken diploma training in photography.
Most importantly, to be a good real estate photographer, you don’t necessarily need a degree or a diploma but a good grip on the art and a strong portfolio that showcases your creativity.
Real Estate Photography Equipment
Real Estate Photography doesn’t demand heavy and expensive equipment. It depends on the photographer’s creativity and ability. We have compiled the basic equipment that might be useful for you:
Camera
A full-frame camera works best for real estate photos. They have a dynamic exposure range that can capture the room’s extremely bright or dark spaces. Cameras with a full frame are the best option for commercial photography as they offer a very high resolution, and the images can easily be zoomed in without compromising on resolution. You also need a cable release, multiple lenses, a flash, and wireless triggers, which usually come with the camera.
Lenses
For real estate photography, professionals recommend wide-angle lenses as they allow you to cover wider property areas and enlarge tiny areas without disrupting the resolution. The lens should be 16-35mm for a full-frame camera. If you are using a cropped sensor camera, it should be aimed at around 10-22mm and 12-24mm.
Lighting
You don’t need to acquire any lighting equipment to get started. However, if you plan to stay competitive, you’ll need it over time. Extra illumination is required when photographing gloomy interiors.
Light stands are another important piece of equipment for real estate photography for positioning your speed lights in various room parts to illuminate them.
Multiple light sources are generally a good idea when photographing real estate. For example, one Speedlight can be attached to your camera while a softbox or another Speedlight is attached to a light stand in another corner.
Make sure your flash is bounced from the wall behind you or the ceiling above you. Experiment with different bounce places until you achieve the desired illumination.
The best lighting for exterior home photography is early and late in the day when the light is warm and golden. The sun’s direction is also significant, so use an app like PhotoPills to figure out where the sun will be during the picture session. In general, shoot with the sun shining on the front of the house.
In the winter, the sun hardly shines on the front of certain south-facing residences.
If you don’t like how the light looks in the morning or afternoon, try shooting on a cloudy day. Cloudy skies can help with sun position issues but talk to your customer first because white sky might detract from an otherwise impressive outside photograph.
You may also use the dusk/dark strategy if you’re having trouble finding a decent moment to photograph during the day.
For interiors:
Natural lighting is best for real estate photography, but only some parts of a property are lucky to have that. So you need to ensure that there are no dark spots in the picture. Illuminating a room that appears in the viewfinder is significant in real estate photography. Therefore, it is important to use proper lighting. However, you will need to recognize the placement of your speed lights to brighten the dark spaces.
Having multiple light sources can do wonders for the photograph of the room. Playing around with Speedlight and a softbox light on a light stand can also help you enhance the photo. Experimenting with different placements of the extra lights can help you get a unique shot. Ensure the flash is bounced from the ceiling or the wall behind you.
For Exteriors:
It is suggested to try shooting the house’s exterior during the golden hours of the morning or the evening. It is when warm tones of the sunrays strike the house, and it looks its best on camera. It is best if the sun shines directly in front of the house at that time. Playing around with how you can work best with the sun’s direction is up to the photographer’s creativity.
Strong sunlight during the day can give the picture overexposure and make it challenging to work with. In the wintertime, when the sun dims out, shooting on a cloudy day works with a little magic of editing to brighten the picture later.
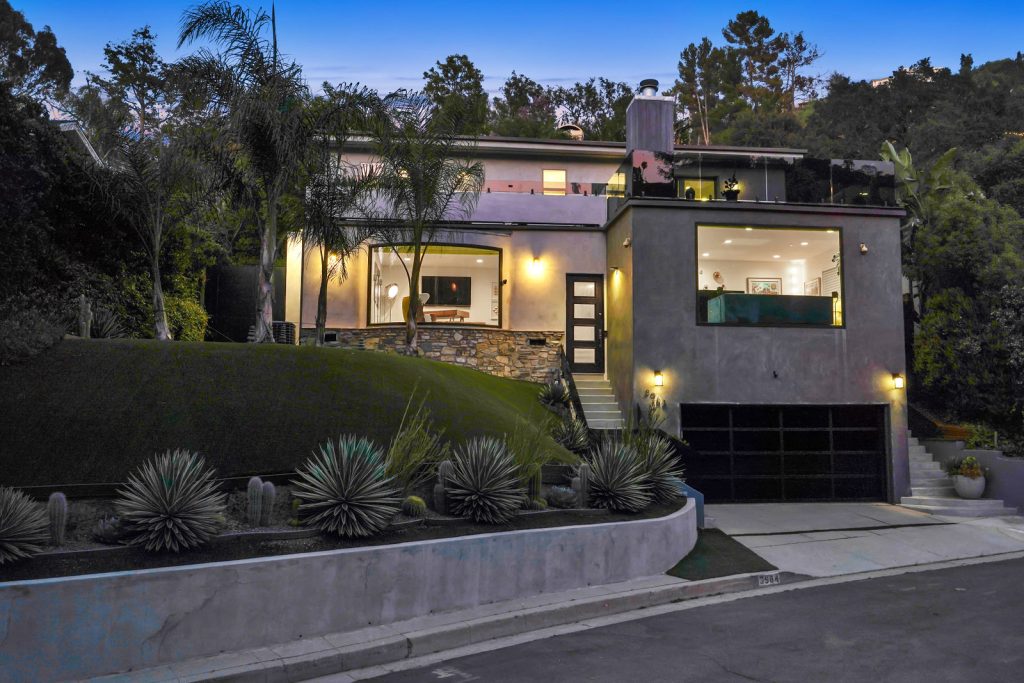
Here’s a tip, include a night shot with the main exterior shot of the property. Something about a warm-lighted property under the night sky just hits home. You can play with the existing exterior lights of the property, manage the exposure and increase the ISO to shoot a vivid property photo in the dark.
Tripods
You need a stable shot for high-quality pictures, especially during long exposure shots. A tripod is essential in any real estate photography. Clicking pictures of the different rooms on the same tripod height will enhance the flow among the pictures making it comfortable for the viewer to surf through.
Extra Accessories
Remote triggers are incredibly useful for taking pictures without touching the camera, helping it focus better. It will prevent you from unknowingly shaking the camera and avoid unclear and blurry photos.
Flash triggers come in handy when some rooms aren’t blessed with the best natural lighting and aren’t big enough to fit a large light stand. Flash triggers can be placed in different locations that brighten the room with every shot. Their easy portable character gives you more options to find the best lighting for the room.
Lightweight light stands can be purchased to put your extra lights on, and C-stands are the best ones as they fit flashguns and strobes.
How to Take Real Estate Photos?
Making a list of everything you need to do while shooting for real estate will help your productivity and make the task much more doable. Here are six steps you can follow:
Step 1: Planning
Planning is an essential part of your process. There is much to be done pre-shoot, during, and post-shoot. Having it, all planned out will lead to an organized and efficient outcome.
For starters, you need a grip on the property to plan out different angles of clicking interiors and exteriors. You can explore it before the day of the shoot to better understand the natural lighting so you can plan when to conduct the shoot. Visiting the site will also help you explore different elements of the property, like gardens, pools, patios, etc., that you can work with the beautify the end product.
Knowing the site will help you plan for the necessary equipment and create a tentative budget.
Step 2: Getting Ready To Shoot
Visiting the property prior will help you gather everything you need to get ready for the shoot. One of the important parts of this is to give feedback to the agent if there are any improvises you want to make to the staging for a better shot. If the property is still resided by previous owners, ensure your agent lets them know to declutter the space and organize as much as possible for a neat photograph.
Once everything is set and planned out, it’s time to pack for the big day. Keep extra flashes, tripods, and a stand as you pack the camera set. Start with a clean SD card, and always have a hard drive to ensure you have space for a whole lot of shots. Then, charge the battery fully and carry extra ones for power backup, just in case. Being mindful of little things like this while getting ready to shoot will help you entirely focus on the shoot with fewer possibilities of technical issues.
Step 3: Maintain Composition
It might take a couple of projects to get comfortable with composition. Professional real estate photographers have an eye for angles to recognize perfect framing. There are certain rules to simplify the process of maintaining the correct composition.
Exterior Photo Composition
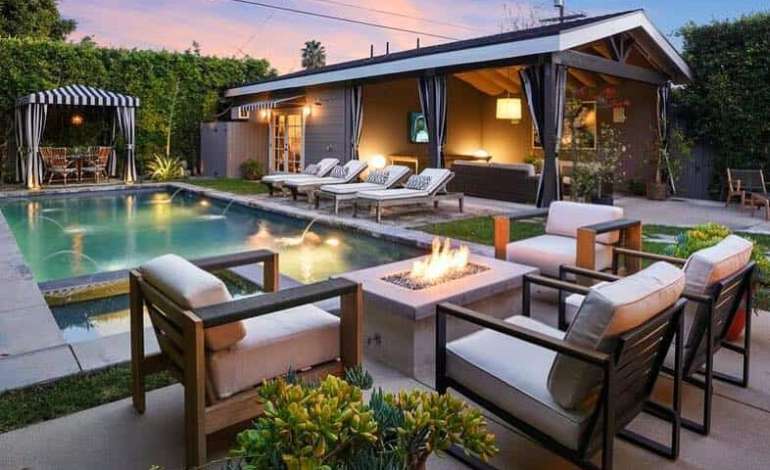
Exterior and aerial shots of the property are the first impressions to hook a possible client. Your primary goal is to make it look the most appealing.
While featuring the property, your exterior photo should also compliment the driveway, front yard, back yard, garden area, pools, and all. It is suggested to click the picture from a corner angle, where two sides of the house are shown along with the elements surrounding it. You also need to be mindful of the natural lighting. You can also use reflectors to increase the brightness. Finally, remove any airconditioners or garbage cans to avoid any negative distractions in the photo.
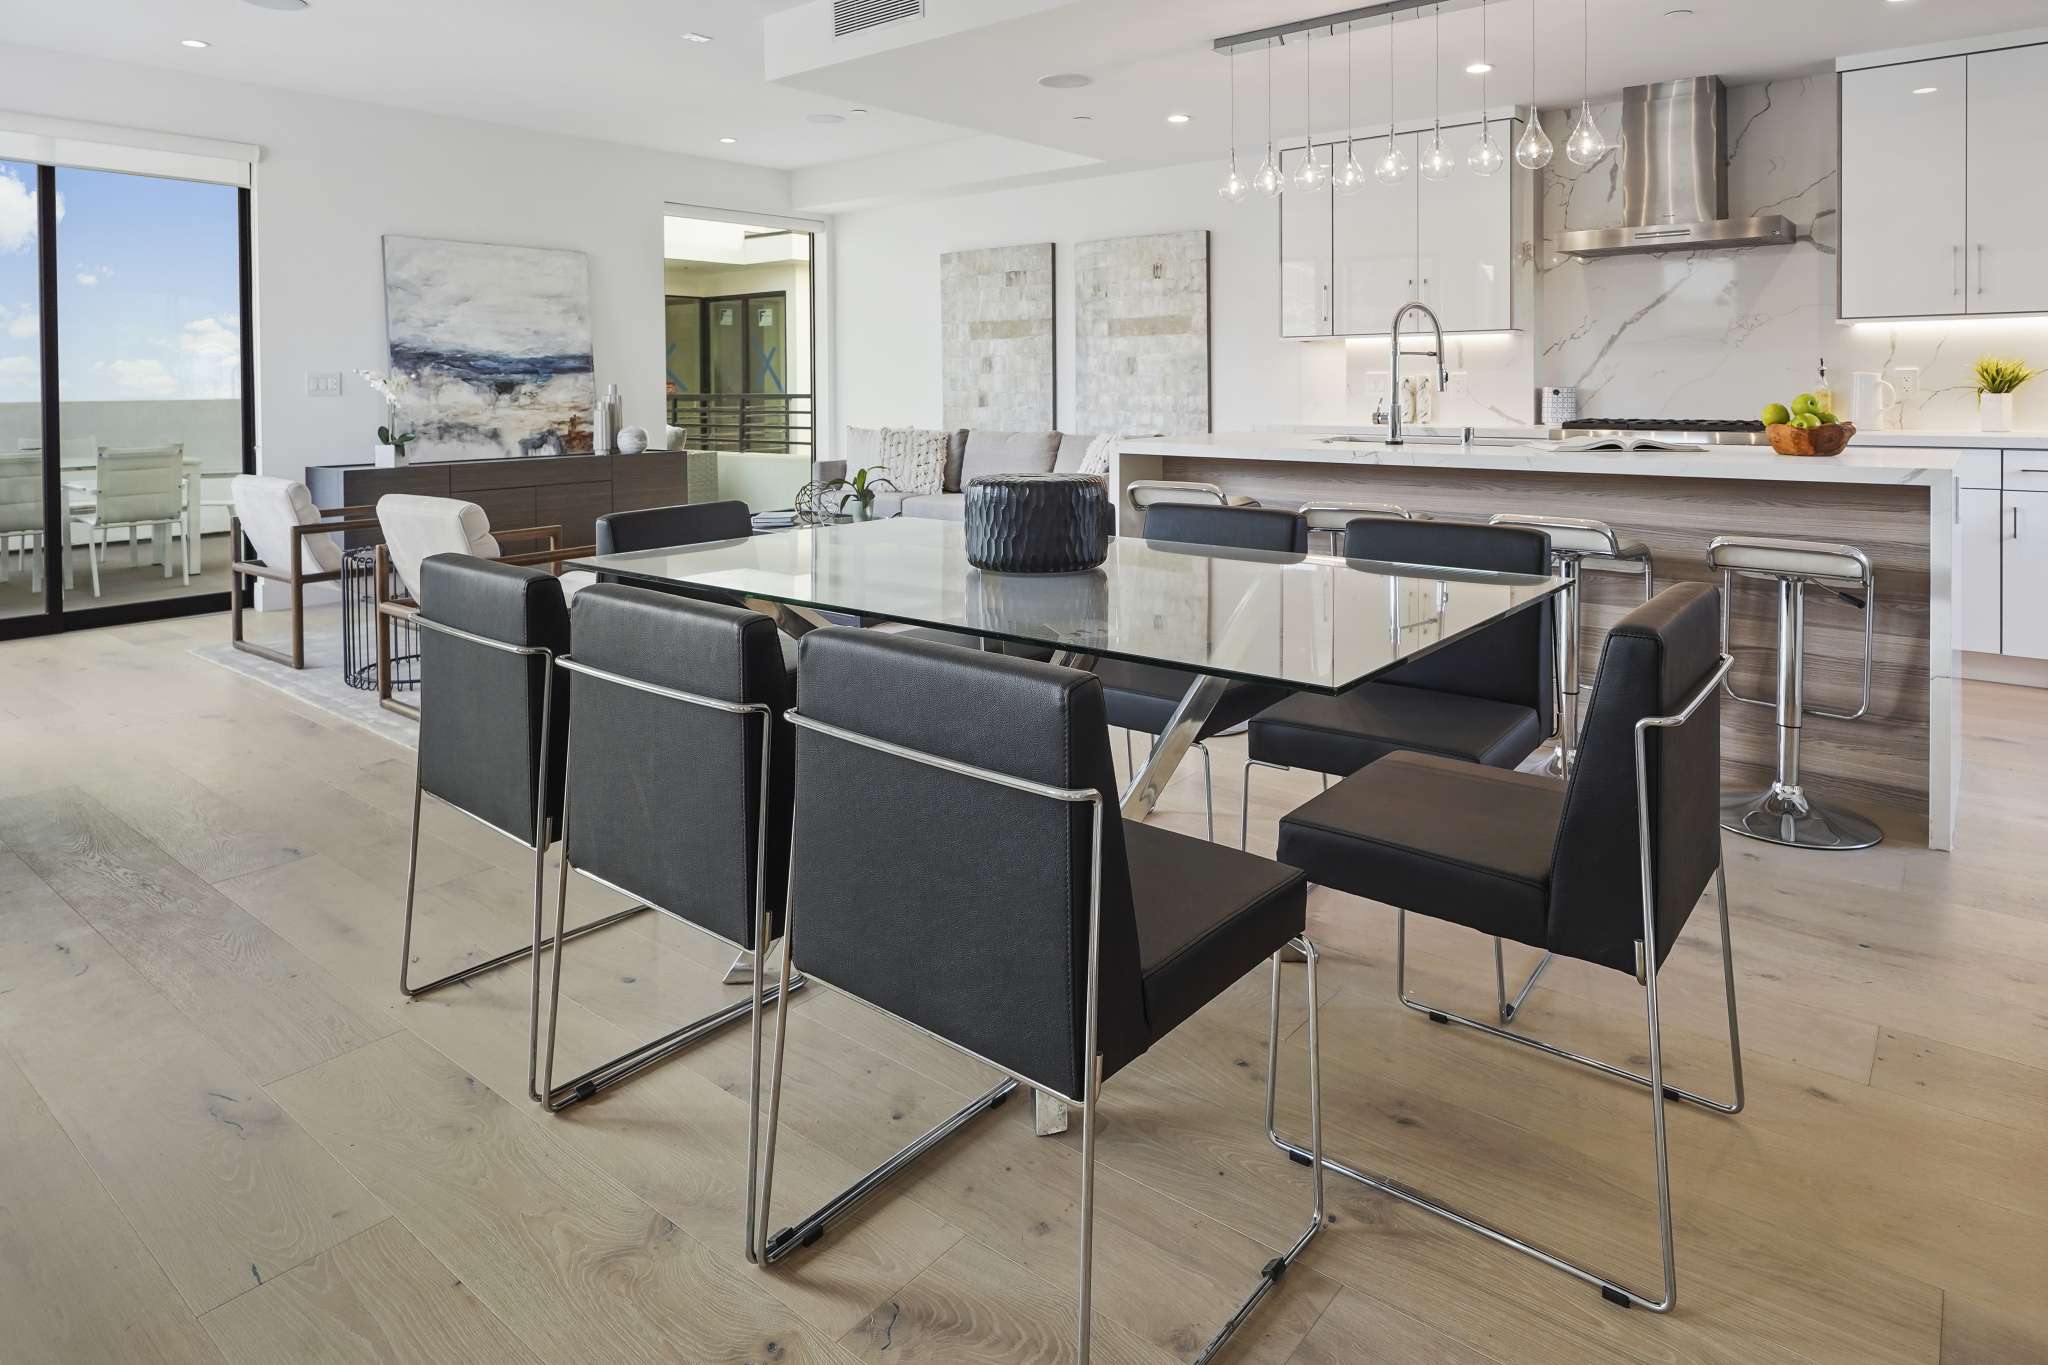
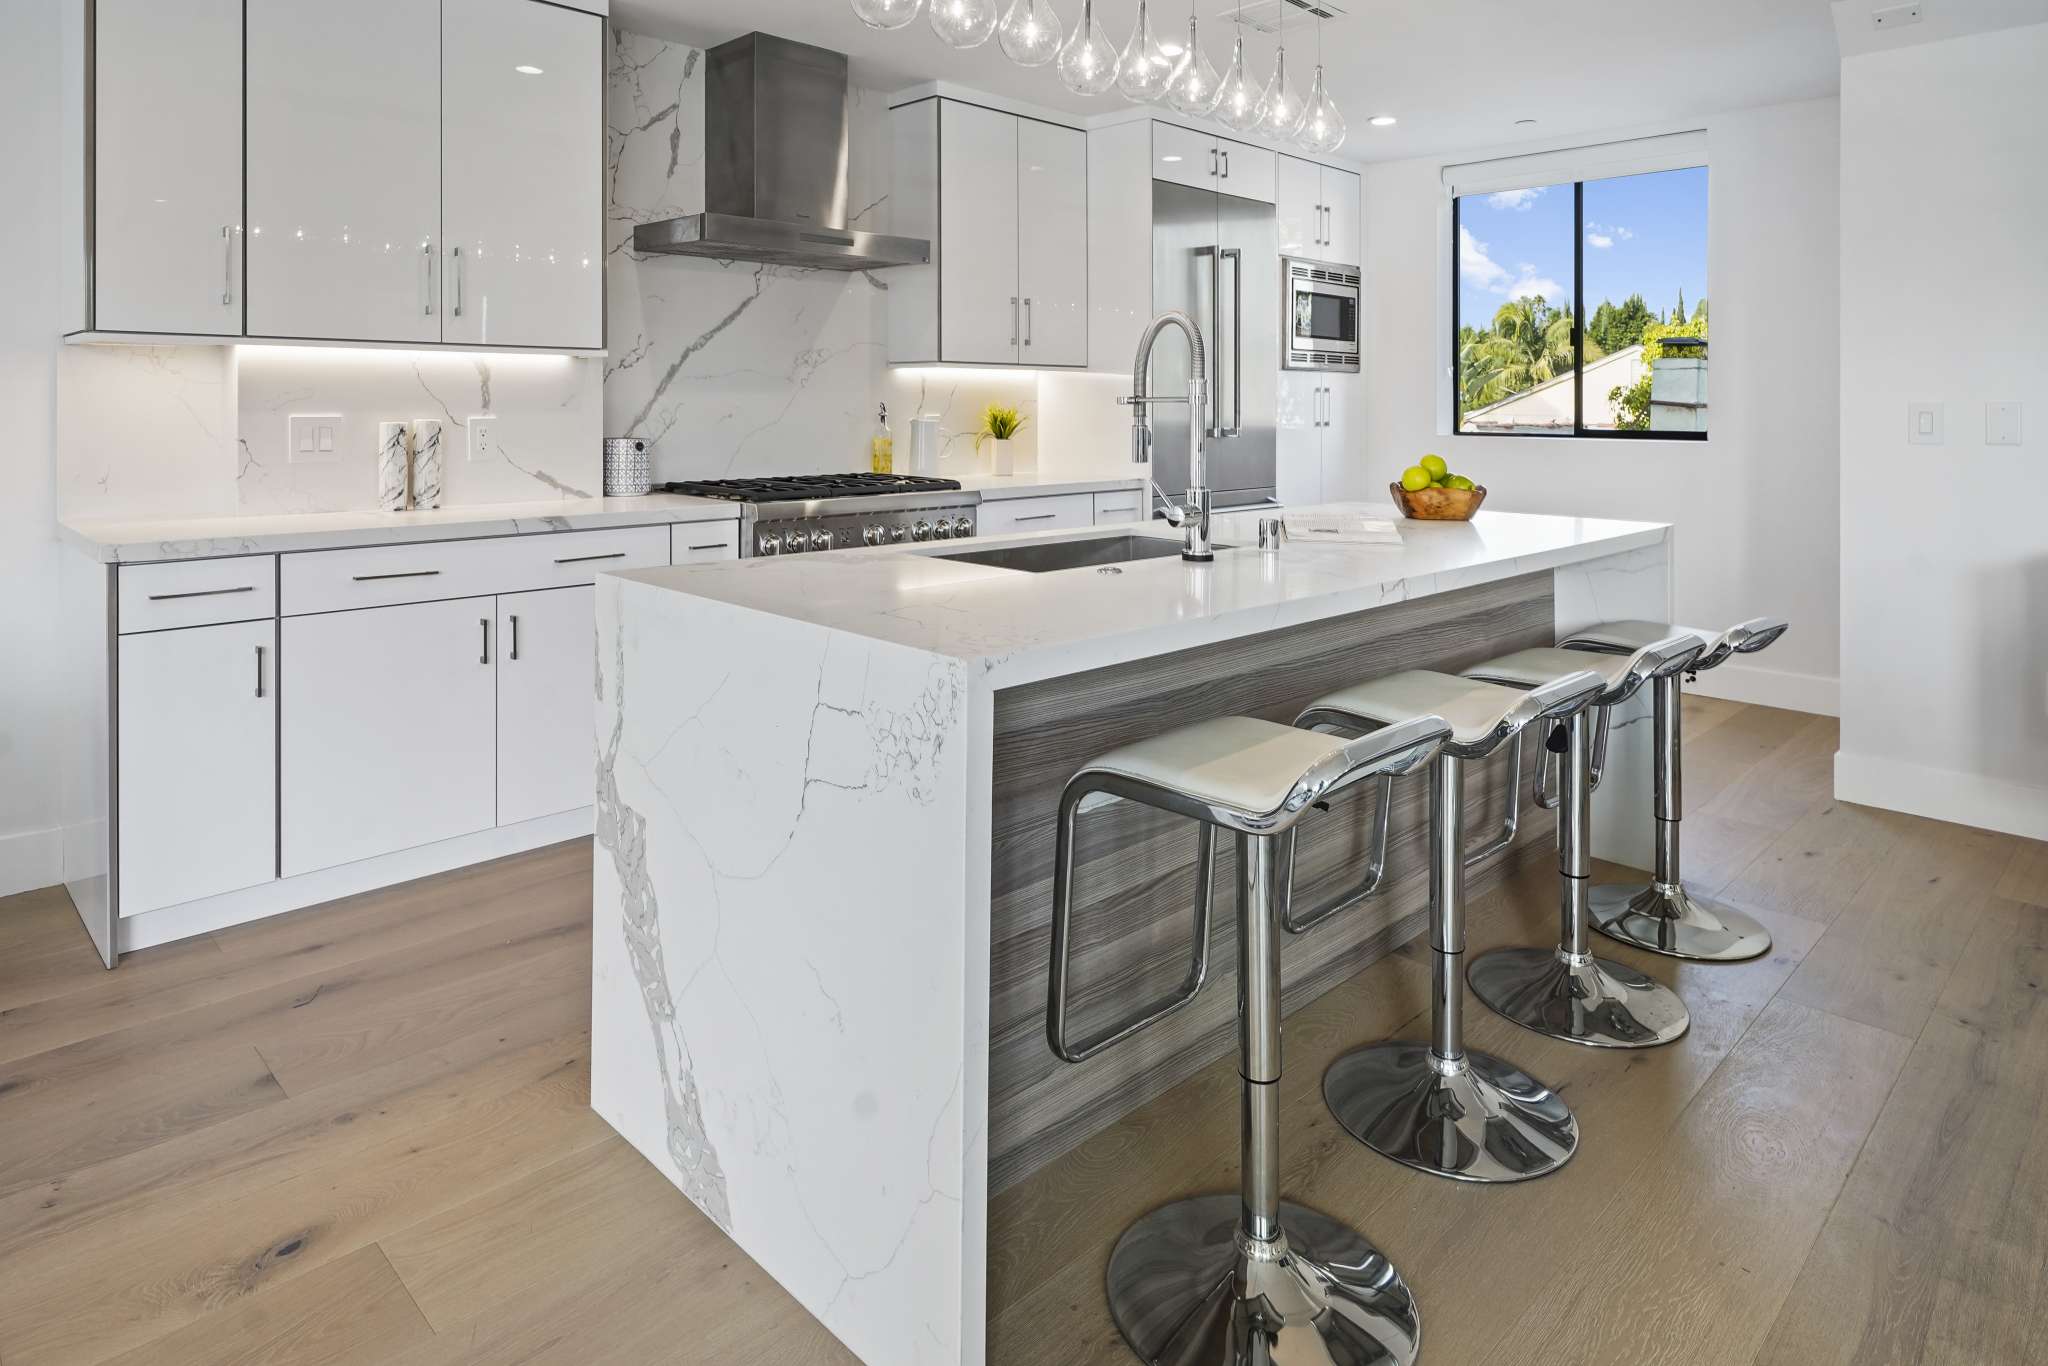
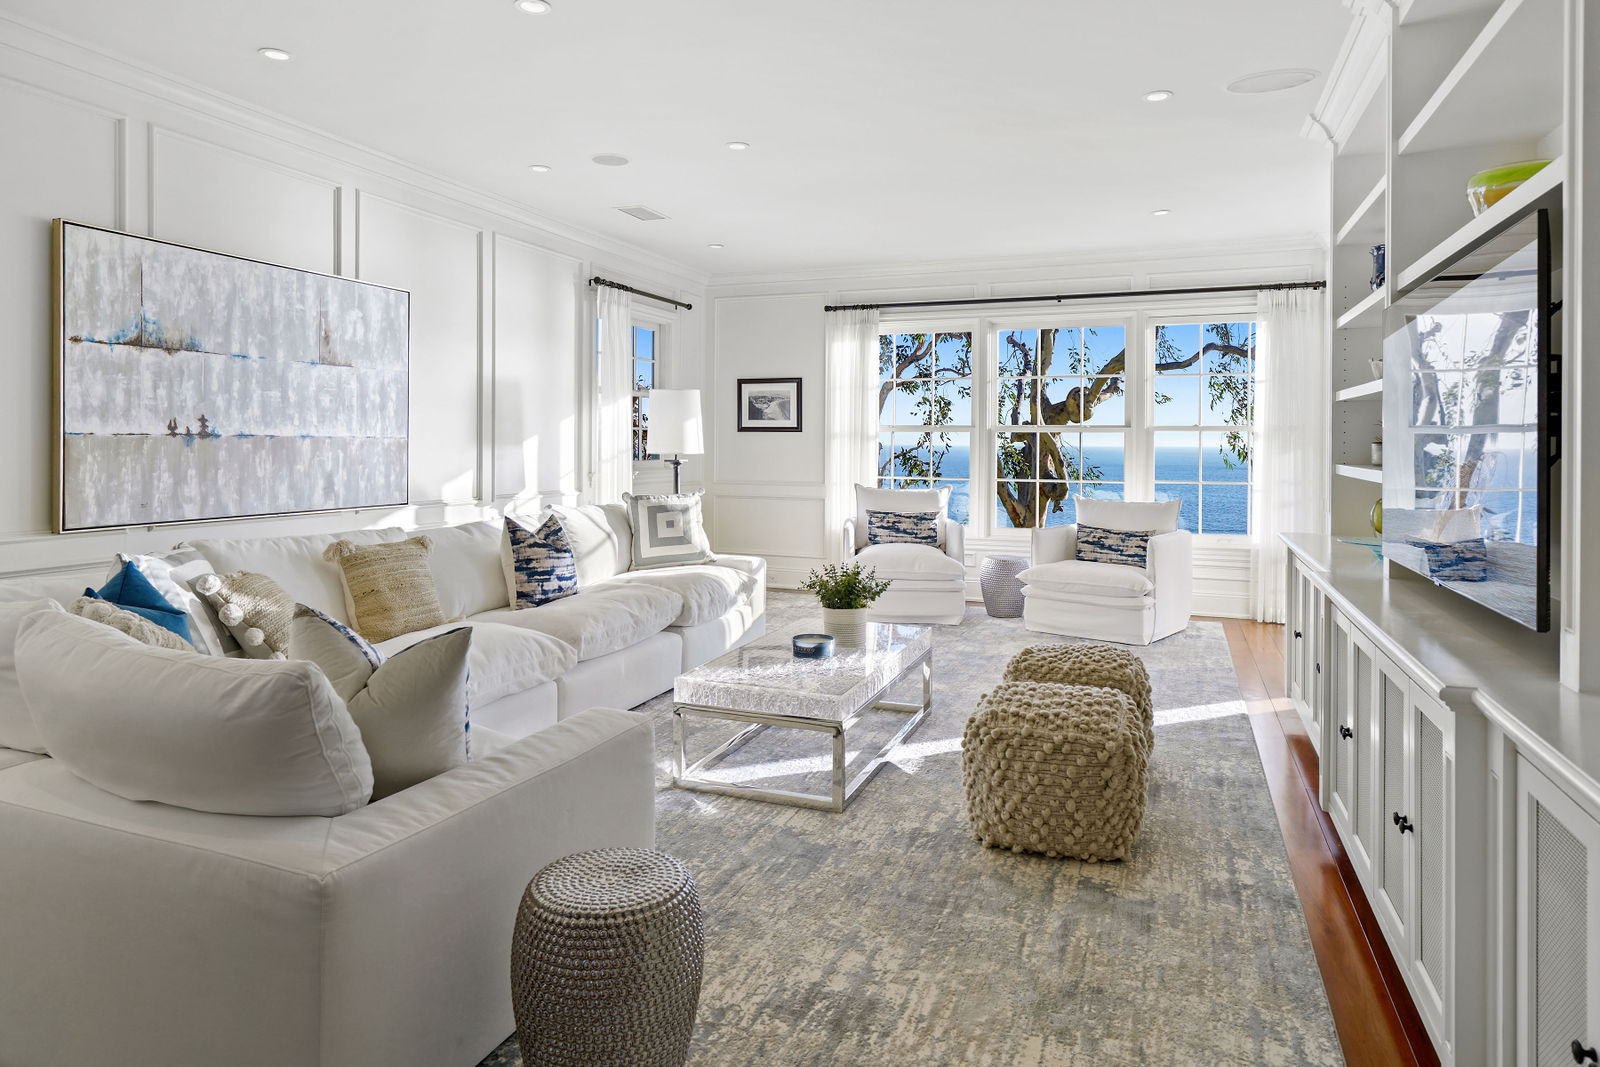
Interior Photo Composition
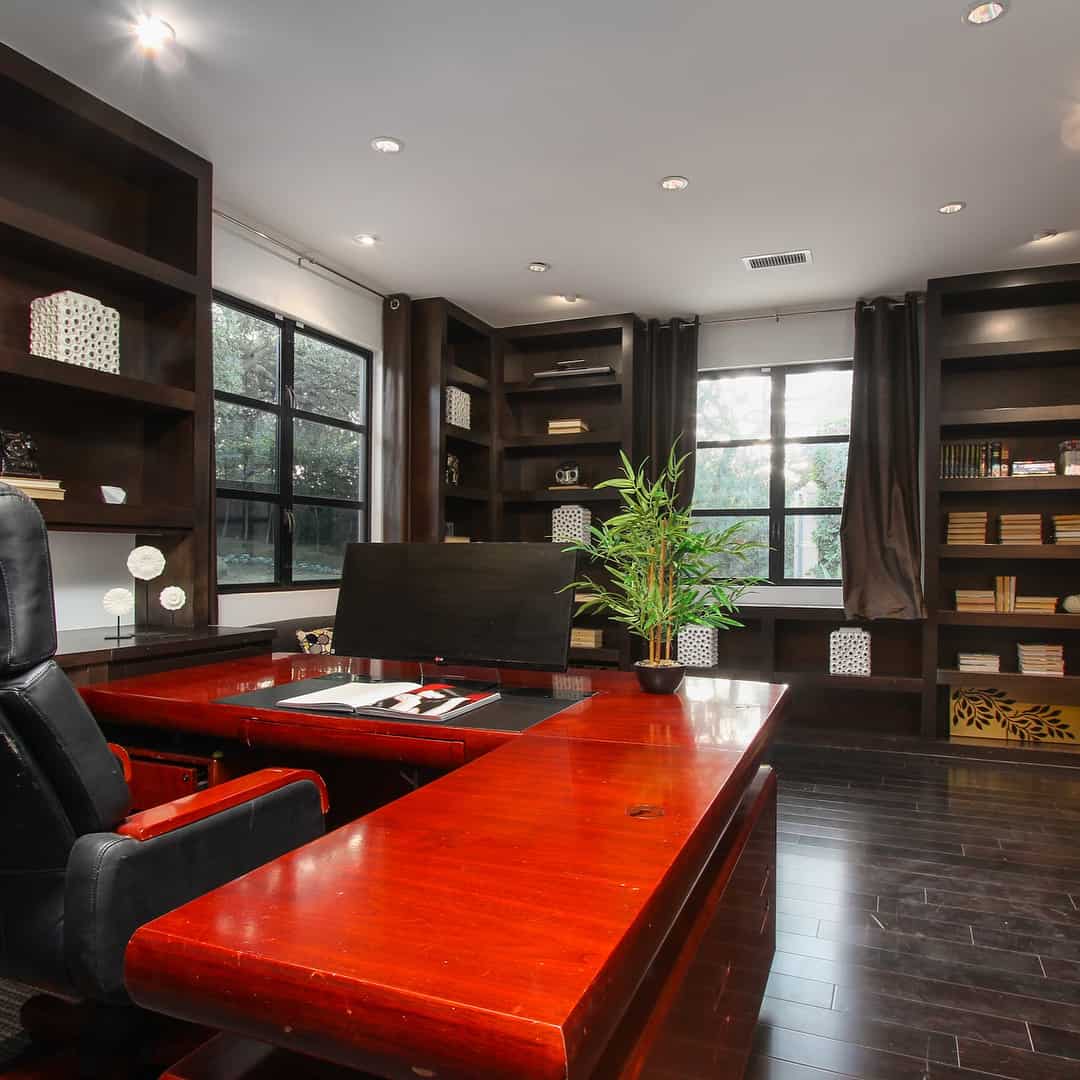
Everything you are putting out in a frame is what the possible clients are appealed by. They look at the images and picture themselves living in the space. You are doing your job well if you can give them everything they want to feel comfortable in their vision of the space.
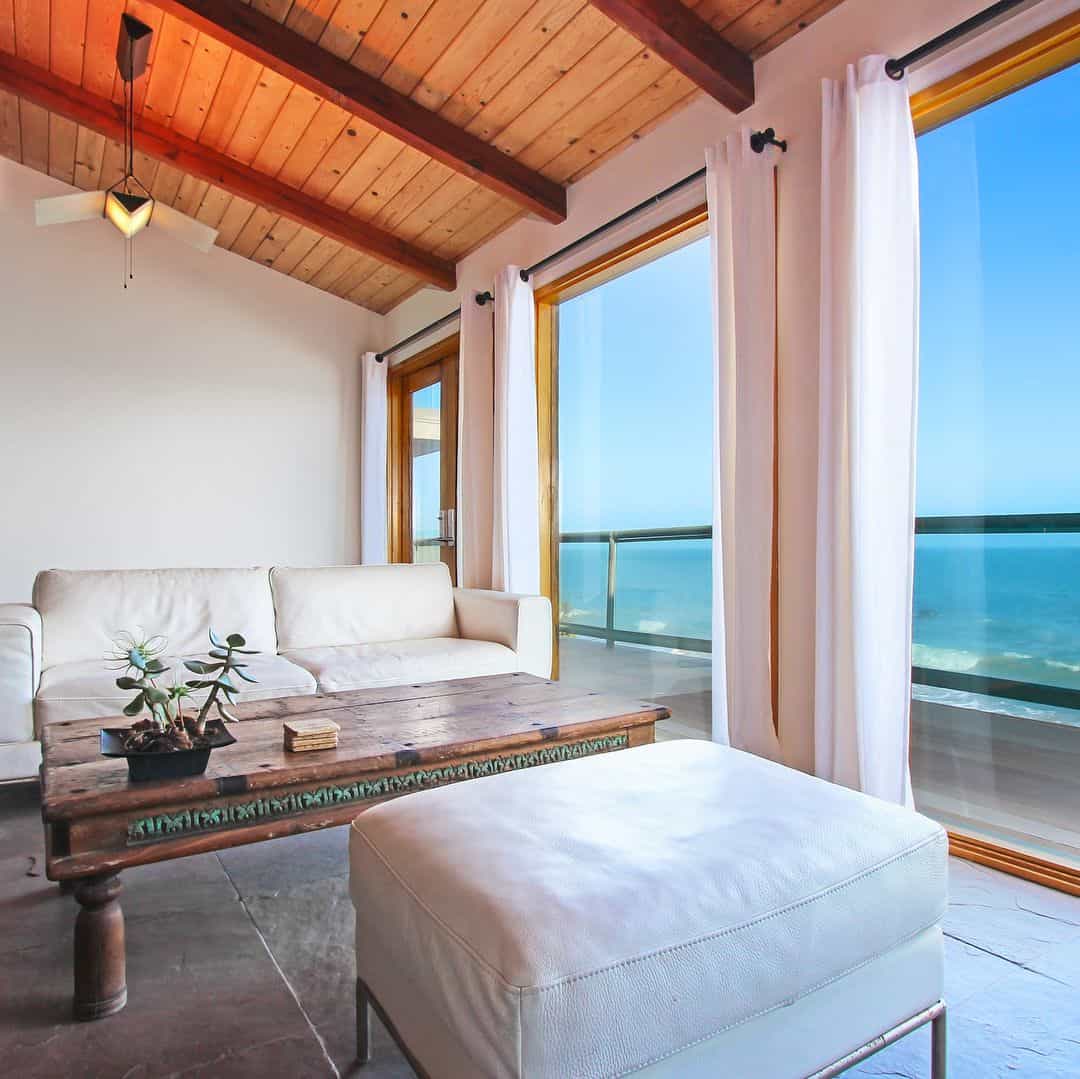
First, you need an organized and decluttered space to ensure no unnecessary distractions in your composition. Find the best angles that serve the place well. Natural lighting is best to have the most realistic pictures. Protip, incorporating a window view in the frame, that is, if the room is blessed with a good view, can enhance the look and feel of the space.
You can also use the wide-angle lens to your advantage if the room is narrow or small.
Key Composition Tips To Get The Vertical Lights
With real estate photography, your primary subjects are houses and rooms. It is always upright when you view it. Therefore, framing with vertical borders is essential. You don’t want angled borders that cut off furniture unevenly or feature other parts of the room unintentionally. Such small details can completely change how the photograph is viewed. If it is difficult to maintain the composition while clicking the picture, you can also work on it while editing.
Here are five pointers that will help you frame with vertical borders:
- Using 24-70mm or 26-35mm lens.
- Tripods with quick-release legs will help you position the camera more easily.
- Double-check your camera composition. You need to endure there is no distortion to the vertical lines on either side of the frame.
- Use photo editing tools like Adobe Lightroom. Adobe camera lens profile will also give you gridlines to check whether the frame is vertically upright. Use a fine tune to improvise it if not.
Step 4: Adjust Camera Settings
Properly adjusting real estate photography camera settings is another essential step. You are working with different colors, textures, and lighting. Depending on these factors, one room may need different settings. Shooting in RAW file mode is best for real estate photos. For example, an image clicked as a RAW file with an increased aperture will help you work with the highest quality and nurture the crisps and edges of the elements in the photos.
Setting the aperture to f/2.8 will let in more light, and lowering your shutter speed is ideal if you need a photo to focus on just one section of the space. For a full-room shot, increase the aperture to 5.6 or higher. Remember that a lower shutter speed can lead to shaky photos; make sure you use a tripod.
With that, low ISO will help you avoid grainy shots. The ideal ISO setting for real estate photography is 400-600.
Step 5: Lighting
Much of your time will be spent working for the best possible lighting in a space.
Lighting For Exteriors
Most real estate professional photographers agree that a house look’s comfy-est with the morning or evening golden sunlight. If the area of your project is blessed with sunrise or sunset moments, make the most of it. You can play around with different angles at this time.
When shooting on mid-day light or cloudy days, work with the exposure to make sure the image is clear and has no unnecessary shadows. Such shoots might need more work brightening in the editing stage. Using reflectors while capturing the picture can also be of great help.
When conducting nighttime shoots, turn on every outdoor light on the property. Pictures of properties in the night ate a great addition to the collection, sparking a homey attachment to the house. Try your best to incline the image towards warmer tones while. You don’t need a vivid image; that is the job of the daytime shots. Instead, you need something that gives clients a glimpse of the feels of the house during the night, with just enough visibility and edges that complement the night.
Lighting For Interiors
Interior spaces with natural lighting make your work comparatively easier. However, you must maintain the lighting to avoid possible shadows and highlight every detail in a full-space shot. For spaces with lesser natural light, turn on every light in the room along with extra flashes and lights to brighten the space.
You’ll need to switch on the lights inside to get excellent exposure when shooting in the early morning or late evening. However, if the light isn’t ideal, you’ll need to utilize additional lighting. Pointing the flash to the ceiling or the wall behind you will help with the reflection of light and enhance brightness. It is advised that setting the flash to manual mode will help you with control.
Step 6: Exposure Bracketing
Exposure bracketing is a useful technique when photographing spaces requiring extensive lighting. For example, your camera has Auto Exposure Bracketing (AEB) that allows you to take three (or more) shots with one click; one is under-exposed (-1 or -2 stops), one normally exposed shot as per the setting, and one over-exposed shot (+1 or +2 stops).
With this technique, Photoshop will allow you to merge the three shots. This is a game-changer to work with uneven shadows and bright spots to bring out the best possible photo.
Best Tips for Real Estate Photography
By now, if you are intrigued by this genre of photography and want to begin your journey as a real estate photographer, we have compiled 12 tips to help you excel at it.
Tip 1: Highlight The Best Features
Eye for the best feature in the room and revolve other elements around it. For example, let’s say a grey-toned modern kitchen has an enticing kitchen island in the middle. You can add a flower pot as a pop of color in the middle of the island and add some minor decor pieces in and around the kitchen. Placing the island in the middle as the highlight of your composition will help the best feature become the leading impression of the space.
This trick works with unique furniture, wall color, windows, beds, or even decorated shelves. These features become the attracting factor of the image, creating an impression that it is the entire room that the viewer is attracted to and not just that one element.
Tip 2: How to Make Empty Rooms Look Attractive
Working with an empty space can take time and effort. It is hard to help viewers understand the size of the space, making it difficult for them to assume their needs. This can be easily solved using virtual staging tools and software.
Click the picture of the room, preferably in wide-angle. And a designer will work with that image to virtually add all the elements. All you need to do is ensure adequate lighting and that the edges and corners of the room are properly visible.
Tip 3: PreShoot
Examining a room before starting the shoot is as essential as shooting itself. You need enough time and effort to understand every aspect, from room sets, decor placements, lighting, shadows, additional lighting, and camera settings. A detailed approach from the beginning will help you capture the best room photograph.
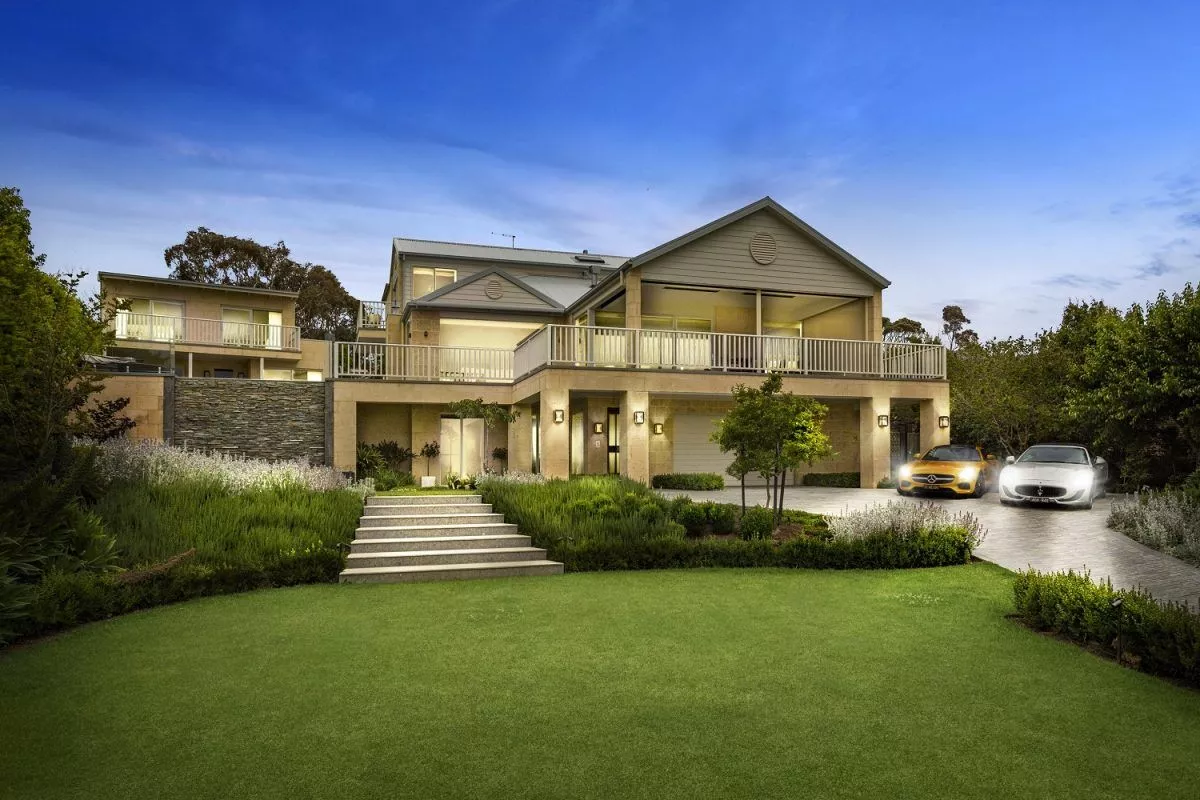
Tip 4: Emphasize External Beauty
Ever run across a breathtaking outdoor shot of a house with enticing architecture, color, front porch, garden, and all the goodies to find yourself admiring it for a hot minute? I have, and all my fantasies of a dream home flashed before my eyes.
It is an understatement to say external beauty makes the first impression of a property. Yes, your clients are looking for a property, but more importantly, they are looking for a home–their home. As a real estate photographer, you need to have an eye for architecture through the lens. Emphasizing external beauty with pictures that do justice to the true beauty of space should be your primary goal.
Tip 5: Ask Your Client to Clean the Property.
It is all sunshine and butterflies to work with an empty, newly constructed, renovated, or well-designed space. But not every property comes with all these characteristics. In fact, in most cases, the precious owners still live in the residence when they decide to put it on the market, and you need to work with that.
Before the shoot, you must talk to the sellers to clean and declutter the property. Unfortunately, too many household items can be distracting and unappealing to the viewers for the first impression. So you need to work with what you have, and if clearing up extra items and cleaning the space helps you do that, then so be it.
Tip 6: Always Take Photos From Different Angles.
A detailed plan for all the shots and angles that best suit the spot will help achieve a productive and organized shoot day. But with that, adding in extra clicks with angles that weren’t initially planned is equally helpful. Some spaces with unique angles can surprise you. Don’t limit all the shots to wide-angle. Instead, play around with different spots and angles to demonstrate a space in more detail.
Tip 7: Make Use of Natural Light
While additional artificial lighting makes a room vivid, nothing compares to the wonders a well-naturally-lit space can do. Allow any and all all-natural light in and utilize it to your advantage. Even extra lighting, LED lights, and reflectors are enhanced by natural light.
Tip 8: Get the right equipment
Equipment does not define your outcome as much as your way of perceiving a room, capturing it in photographs. But having the right equipment caters to your convenience and allows you to use all the necessary features. For example, you need the right camera to cater to all the tools you need, finding the right type and size of flashes, extra lights, reflectors, etc.
Tip 9: Know what to capture.
Real estate photography captures more than just a picture of a room–it captures the aura. It is in your control to build what you want the users to feel, and if that aligns with the room’s purpose, you’ve done your job well!
Let’s take a living room, for example. A standard living room feels inviting and homey. These are the aspects you can focus on when planning the shoot. Similarly, bedrooms are comfortable; kitchens look spacious and neat. Emphasizing the qualities of any space can grab the attention of audiences.
Tip 10: Play with camera settings.
A good photographer has mastered the art of composition, lighting, and angle. While the standard settings will help you, you need to understand how every feature works to play around. This will help you experiment with different, even better ways to approach a room and develop a one-of-a-kind end product.
Tip 11: Take advantage of retouching.
The editing phase is just as important as the actual shoot. Working with virtual corrections, HDR adjustments, exposure, cropping, sharpness, contrasts, color tones, and alignment using photo editing software can take your pictures to the next level. You will thank yourself for shooting in RAW file mode, as it preserves the high resolution of the original picture while editing.
Tip 12: Avoid common mistakes
- Often clean your lenses properly.
- Avoid flash reflections, and make sure there is no unusual flash reflection at any part of the photo, as it suggests unprofessionalism.
- Ensure there is no clutter in the space.
- Never overdo retouching. It can distract your viewers from the real picture negatively.
- Make sure there are no people around for a standard, professional-looking photo.
- Include a consistent collection of full-room shots and detail shots of attractive sections of the space.
Post Processing Real Estate Photos
The post-production process is another equally important stage. Now is the time to swing and flick your photo-editing skills and bring the loveliest property pictures to your clients. At this point, you will hide any faults in the picture and make the end-product pleasing. Real estate photography intends to help possible clients tour a place through pictures; you are the guide with the magic ‘editing’ wand!
You can work with four elements while editing:
With the help of editing tools like Adobe Lightroom, you can highlight and shadow certain parts of the room. This would come in handy if you used artificial lighting for the shoot to help regain that natural feel.
Some photos can become shaky and distorted instead of perfectly vertical borders, especially in wide-angle shots. Lens correction panels will help you restore the distorted parts and attain neat and vertical frames.
White Balance will help you play around with warm or cool tones in a room based on what is needed to make it more tempting. When you click in RAW, there are more chances for the color tones to seem imbalanced compared to what you saw initially in the viewfinder. White Balance will help you restore and enhance that.
Lightroom presets are groups of settings from previous editing projects that are saved and can be reapplied to other images. Creating presets for your initial editing works and using them on similar pictures later will help you edit more efficiently. This will also help maintain consistency in terms of editing all images in a collection.
How To Become A Real Estate Photographer?
After you have taught yourself the basic skills required to be a real estate photographer, you need to put yourself out there in the market. How you present yourself, your work, and your professionalism matters if you want to stand out in this growing industry.
Build A Portfolio
Building a portfolio is the first and most important step if you pursue this field as a career. Your portfolio reflects your ability and the main factor when you are being recruited. Put together all your previous work, which in the beginning may include your practice works. With every project, update your portfolio, and you will have strong proof of what you offer as a real estate photographer.
Get Your First Client
You can start by working, as a volunteer or an intern, with a professional real estate photographer. At the very beginning, you might have to settle for no charge for your first project, which is okay. When establishing yourself in the market, you need to work with experts in the actual market, which won’t come with luxury at first.
Practical learning from them will not only teach you new sides but build a stronger foundation and give you a better experience to grasp your duties and responsibilities in your career path. Plus, these volunteer projects will be great additions to your portfolio.
Real Estate Photography Pricing Guide
Working For Free
You will work for free in your first project when learning, in some cases, in the second project. Doing so will help you step into a market, have experiences with professionals and clients, and have a good outcome. Once you have a quality portfolio, it is time to start working commercially and come down to certain charges.
Providing the client with final images
With that said, it is no walk in the park to determine prices based on your experience or understand how you can increase the price with time and quality improvement. Here are some tips that could help in such cases:
- Looking up the prices of other real estate photographers or companies is a good way to price your services. This will help you understand the market and the trends of upscaling the price ranges based on work, experience, and quality.
- Consider all the costs you will need to spend for your services, from types of equipment, pre-planning, and software and devices, as well as outsourcing charges, if any. Your price should be mindful of these expenses too.
- The real estate industry is growing, and so is real estate photography. So you need to put a competitive price to the market by putting forward your work’s quality and unique selling point.
- Stay reasonable, approachable, and in the best interest of your clients. You don’t want to be overpriced; it will put you out of business for people looking for affordable services. But, at the same time, don’t underprice your services, as less budget leads to poor quality outcomes that will hamper your reputation.
- Estimate the price based on the time and reasonable to all the expenditures.
- Make sure you are accounting for the relevant time taken depending on the scale of the projects. Provide your services accordingly.
- Have your clients sign a legally bound contract to make your services more authentic. It will help you stay on the safe side with possible distrustful clients.
Conclusion
Phew! Take a sigh of relief. You are now one step closer to being a real estate photographer.
The real estate digital market is only evolving, and the competition is at its peak. You need to give something that has never been done before to stand out. With a creative eye, more practice, strong experience, and a solid portfolio, the possibilities are endless.
In the beginning, you don’t need expensive and fancy equipment. Put in everything you have got to give your clients the best versions of their properties to put up on the market. The true art of photography lies in the eyes of the photographer; the lens will only help you capture it.
If you want to learn more about the market, real estate photography services, and finding a professional to follow, contact Revepix.
Frequently Asked Questions
The price for Real Estate Photography can vary depending on the location, size, and complexity of the shoot. Our competitive price at Revepix starts at $150 for a basic photo package.
We advise utilizing high-resolution Real Estate Photographs with at least 3000 pixels on the longest side. This will ensure that the images are clean, sharp, and detailed, which is crucial for highlighting the best aspects of the property.
For Real Estate Photography, we don’t employ filters at Revepix. Instead, we make use of specialized tools, lighting, and editing procedures to make sure the pictures are true to the property and its qualities. Our objective is to offer excellent, authentic-looking images that enable prospective purchasers to picture themselves residing in the place.
We advise taking Real Estate images during the “golden hours,” or the time shortly after sunrise and just before sunset, when the light is soft and warm, to make the most of the available natural light. Opening windows and curtains to bring in as much natural light as possible is also essential, as is positioning the camera to make the most of the light source. In order to control the light and produce a more equal and appealing appearance, we also utilize diffusers and reflectors.
Depending on the property and its qualities, several angles will work best for Real Estate Photography. But, to highlight the layout, features, and special selling qualities of the property, we often combine wide-angle images and in-depth close-ups. We also provide special attention to angles that show the flow and atmosphere of the room to potential purchasers. Our ultimate objective is to give a thorough and eye-catching picture of the property that makes it stand out on the market.
You will need a camera with a wide-angle lens, a tripod, and lighting supplies like flash or studio lights to start photographing real estate. Also, to improve and edit your images, we advise utilizing a program for photo editings like Adobe Lightroom or Photoshop. At Revepix, we only utilize professional-grade tools and editing software to produce the best possible photographs.
For Real Estate Photography, a wide-angle lens is perfect since it enables you to include more of space in a single image. For Real Estate Photography at Revepix, we frequently utilize lenses with a focal length of 16–35mm, which enables us to capture the entire room and highlight its distinctive qualities.
Depending on the camera being used and the lighting situation, the ideal camera settings for real estate photography will be determined. However, to ensure a perfect focus throughout the entire shot, we advise choosing a low ISO setting (100-400), a small aperture (f/8-f/16), and a shutter speed that is suitable for the lighting conditions. In addition, we use the RAW format while shooting to provide editors with more flexibility and control.
The angle of the property and the amount of available natural light will determine the optimal times of day to take real estate images. In general, we advise shooting during the afternoon when there is plenty of natural light and the location is well-lit. Nonetheless, it’s crucial to take into account the property’s direction and how light enters the room.
Although cellphones’ cameras have advanced significantly, we still advise utilizing a professional camera for Real Estate Photography. Professional cameras have more control over parameters like ISO, shutter speed, and aperture, all of which are essential for producing high-quality, properly exposed photographs.